Create your first Flutter Application: Step by Step Guide
Hey everyone, welcome to our new article! Today, we’ll learn how to create your first app in Flutter. Let’s get started!
Set Up Your Environment
Before we dive into coding, make sure you have the following installed on your machine:
- Flutter SDK: Check out this article Flutter Setup where I comprehensively guide you through setting up the Flutter environment on your machine.
- Android Studio or Visual Studio Code: These are the recommended IDEs for Flutter development. You can choose either based on your preference.
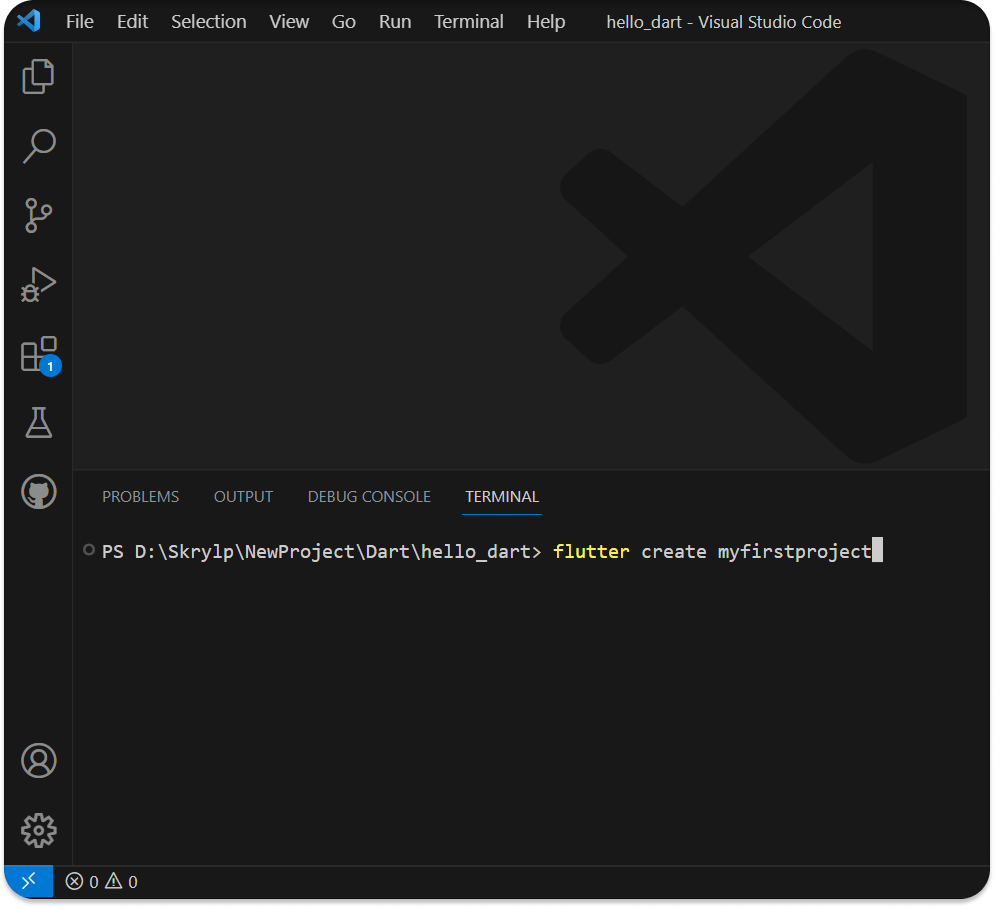
In this article, I’ll be using Visual Studio Code. Follow these steps:
- Open Visual Studio Code: Launch Visual Studio Code.
- Open a New Terminal: From the top menu bar, select
Terminal > New Terminal. - Create a New Flutter Project: In the terminal, run the command
flutter create "your_project_name".
Important Notes
Project Naming Conventions:
- Use Lowercase Letters: Your project name should be in lowercase.
- Avoid Camel Case, Kebab Case, and Pascal Case: Use snake case if needed.
What is Camel Case?
In camel case, you start a name with a lowercase letter. If the name has multiple words, the subsequent words start with a capital letter. Examples: firstName, lastName.
What is Snake Case?
In snake case, you start with a lowercase letter. For names with multiple words, use an underscore (_) to separate the words. Examples: first_name, last_name.
What is Kebab Case?
Kebab case is similar to snake case, but you use a hyphen (-) instead of an underscore (_). Examples: first-name, last-name.
What is Pascal Case?
In pascal case, names start with a capital letter. For names with multiple words, all words start with capital letters. Examples: FirstName, LastName.
Continue with Your Project Setup
- Navigate to Your Project Directory: Use the command
cd "your_project_name".
cd "yourprojectname"- Open the new window for Project in Visual Studio Code: Use the command
code ..
code .This will open a new window with all your files and packages in the Flutter project.
The new window that you just created looks like this:

Folder Structure
Let’s break down the folder structure of a new Flutter project.
When you create a new Flutter project, it comes with a bunch of folder and files.
- lib
- This is where your Dart code goes. The main file you’ll work with is
main.dart.
This is the entry point of your app, where the app starts running. You can create more Dart files here as your app grows. like separating different parts of your app into different files for better organization.
- This is where your Dart code goes. The main file you’ll work with is
- test
- This folder is for writing tests for your app. Tests help you ensure your app works as expected by checking different parts of your code automatically. You can write different types of tests like unit tests, widget tests, and integration tests.
- android
- Contains files and settings specific to the Android version of your app. If you need to do any platform-specific coding or settings for Android, you’ll work here.
- ios
- Similar to the
androidfolder, but for the iOS version of your app. Any platform-specific settings or code for iOS goes here.
- Similar to the
- web
- If you’re building a web version of your app, this folder contains files related to the web platform.
- macos
- This folder is for the macOS version of your app, with platform-specific files and settings.
- windows
- Contains platform-specific files for a Windows version of your app.
- linux
- Contains platform-specific files for a Linux version of your app.
- build
- This is where the build outputs of your app go. You usually don’t need to touch this folder, as it’s managed by Flutter.
- .dart_tool
- This is a hidden folder used by Dart tools. It contains metadata and other tool-related files. You don’t need to interact with it directly.
- .idea
- Another hidden folder, used by IntelliJ IDEA or Android Studio to store project-specific settings.
- .vscode
- Contains settings and configurations for Visual Studio Code if you’re using it as your editor.
- pubspec.yaml
- This files is like a configuration file for your project. It’s where you specify dependencies (libraries your app needs), assets (like images), and other settings. You’ll frequently update this file when you add new libraries or assets to your project.
- README.md
- This file is not documentation. You can write information about your project here, like what it does and how to set it up. It’s helpful for others (and yourself) to understand the project later.
- .gitignore
- This files tells Git ( a version control system ) which files or folders to ignore.
It helps keep your version control clean by not including unnecessary files.
- This files tells Git ( a version control system ) which files or folders to ignore.
Create your first Flutter Application
To create your first Flutter application, let’s start by understanding all the code in main.dart. First, delete all the code in main.dart because I’ll guide you from scratch.
Press Ctrl + A and then press the Del button. Your screen should look like this:

Now, let’s start writing code with the main function:
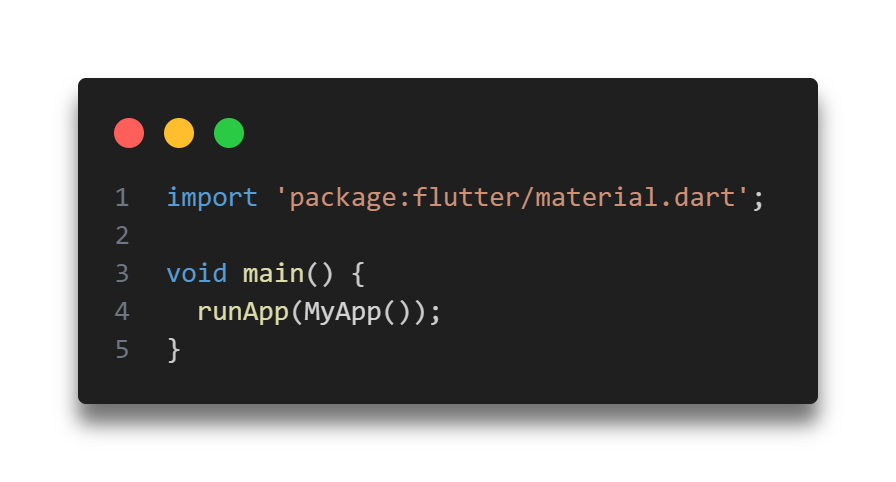
As we know, void main is the starting point of Flutter because Flutter uses Dart, and Dart’s syntax is based on the C-style.
In the main function, we are using the runApp() function.
What is runApp?
runApp is a function you call when you want to start your Flutter app. Think of it as pressing the “On” button for your app. When you press this button, the app takes over the whole screen and shows what you’ve built.
How does runApp work?
- Display You App
- When you call
runApp, it takes the widget you provide and display it on the screen.
- When you call
- Full-Screen Display
- The widget is made to fill the entire screen. If you want to position your widget in a specific part of the screen, you can use special widgets like
Alignto move it to the top orCenterto place it in the middle.
- The widget is made to fill the entire screen. If you want to position your widget in a specific part of the screen, you can use special widgets like
- Replaces Old App
- If you call
runAppagain with a new widget, it will replace the current widget on the screen with the new one. Flutter compares the new widget tree with the old one and updates only the parts that have changed.
- If you call
Class Definition
class MyApp extends StatelessWidget{…}
Now, let’s create a class called MyApp and extend it with StatelessWidget which means that MyApp is a widget that doesn’t change its state once it’s built.
We are doing this to implement MaterialApp() because Flutter uses MaterialApp as a root-level widget.
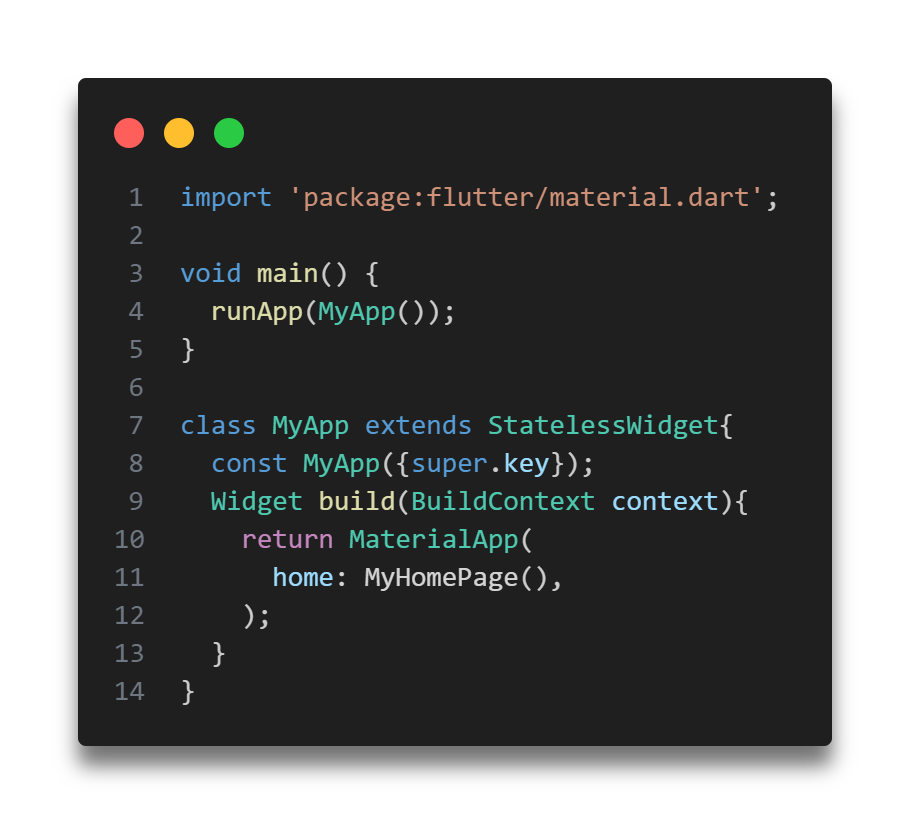
const MyApp({super.key});:
This line defines a constructor for MyApp. The const keyword means that this widget is immutable and can be compiled to a constant. The {super.key} part is passing a key to the parent class (StatelessWidget), which can be useful for managing the widget in the widget tree.
Widget build(BuildContext context){…}:
This method is responsible for describing how to display the widget in the app. Every StatelessWidget must have a build method.
return MaterialApp(home: MyHomePage(),);
Here, we are returning a MaterialApp widget. MaterialApp is a widget that wraps several other widgets that are commonly required for material design applications. It also sets up the navigation for the app.
home: MyHomePage(): This sets the home property of the MaterialApp to another widget called MyHomePage. This means that when the app starts, it will display whatever MyHomePage defines.
In Simple Terms
Imagine you are building a house (your app), and you have a blueprint (the code) for it:
- MyApp Class: This is like saying, “Here is my basic house design.”
- StatelessWidget: This means your house design won’t change once it’s built.
- Constructor: You’re setting up some basic settings for the house.
- build Method: This is where you describe what your house looks like.
- MaterialApp: This is like the foundation and structure of your house, following a specific style (material design).
- home: MyHomePage(): This is specifying the first room (or main area) you see when you enter the house.

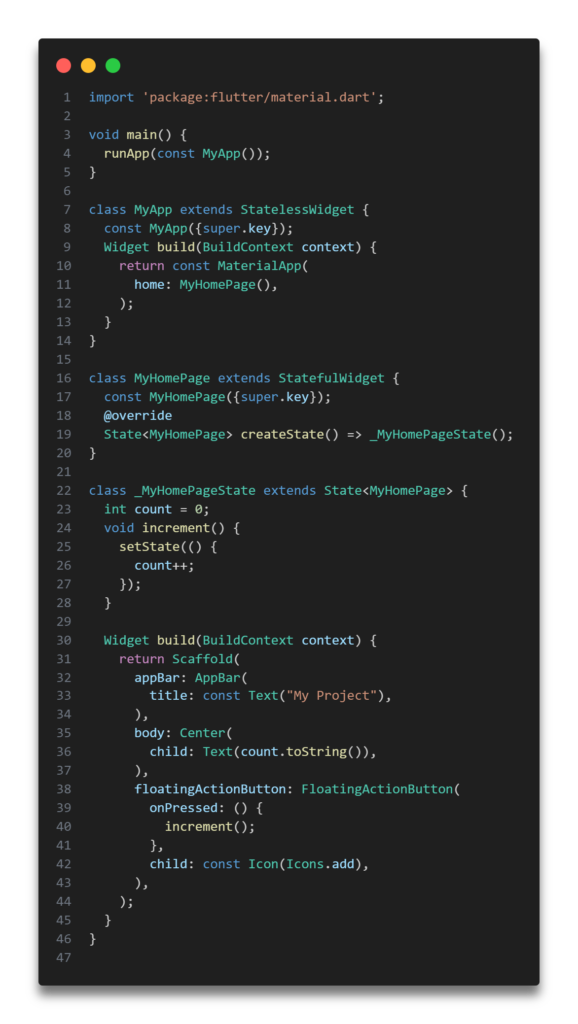
We provide a MyHomePage() widget in the MaterialApp‘s home property. Therefore, we need to create a MyHomePage class and make it a Stateful widget.
The reason for making it a Stateful widget is that we are going to build a Counter app within MyHomePage. When the user presses the button, the state will change, and that’s why we need a Stateful widget.
Now let’s create a variable count and initialize it to 0. We will use a Text widget in the center to display the number on the screen.
While initializing the count in the Text widget, we need to use a method like toString() because the Text widget only displays text, which is a string.
We will also create a function for incrementing the count and set it on the FloatingActionButton‘s onPressed property. This way, when the user presses the floating action button, the number will increase.
Here’s the full source code:
Check out more articles related to Dart Tutorial:
Flutter Setup On Window 11 | Install Flutter Step By Step
One thought on “Create your first Flutter Application”